Thanks to the integration of a targeted software and of a suitable control equipment, today Ceba Ingranaggi can execute also the geometrical control of pitch, propeller and involute for Klingelnberg bevel gears.
There are companies that over the last few years not only have fulfilled a course of internal reorganization and restructuring but have also planned huge investments to enhance their competitiveness level, further developing the quality of the offered product and service. Among them ranks also Ceba Ingranaggi, headquarters at Carate Brianza (Monza, Italy), specialized in the production of gears, racks, toothed pulleys, grooved shafts and all grinding types, which has made the technological upgrading and the more and more managerial running of its activity outstanding differentiating elements.
«The current market conditions – underlines Fabrizio Cesana, owner and manager of the company together with his sister Loretta – impose precise dynamics in the organization and in the management of job orders. The answer we gave some years ago consisted in undertaking a targeted process of revision and of optimization of all operational phases, including also the integration of new machinery and additional support services».
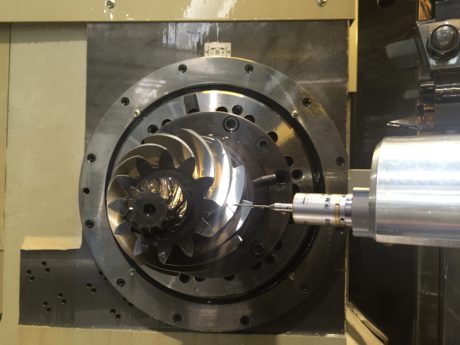
Concerning this, the latest integration in chronological order was the adoption of a specific software and of a control equipment installed on the machine (Renishaw) to be able to perform the geometrical controls of propeller, involute and pitch, without forgetting that the same control can be carried out on Zeiss Control Centre.
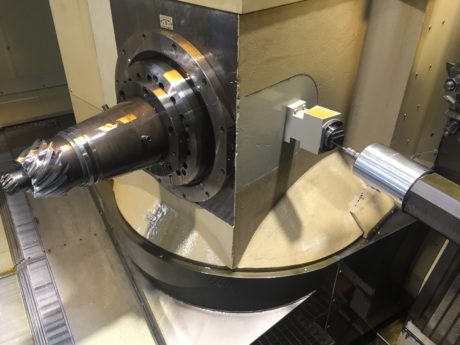
«A scarcely diffused technology, maybe owing to the huge investment – adds Cesana – framed in a context, production control and provisioning of certified graphs and reports, whose relevance is not adequately acknowledged on the market, yet. Apart from where mandatory, but which anyway represents a distinguishing market opportunity».
Technology that, in short, after a first phase in which the bevel gear is rough-ground, provides for the automatic use of a probe that processes a series of detections, supplying the results grouped in graphs and certified reports. At that stage the operator, according to the specific job order and the requisites demanded by his customer, can decide whether to accept or to proceed to a further machining phase.
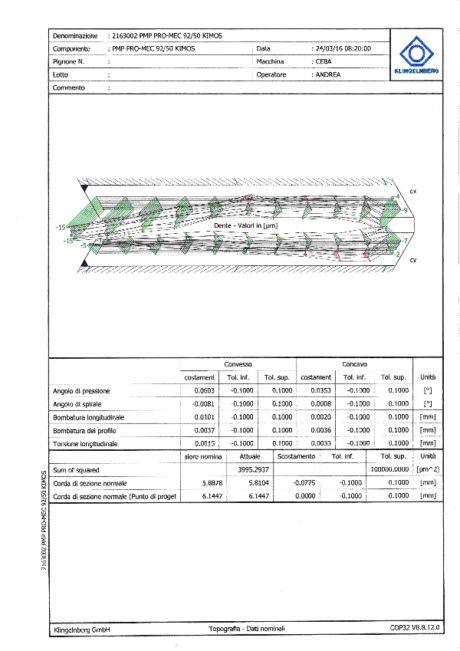
«In that case the software – further adds Cesana – in cooperation with the machine, recalculates the corrections and automatically performs the further last grinding. When the piece is finished, it is possible either to perform the control again directly on the machine generating the related graphs and reports, or to proceed by transferring the piece itself to the metrological division on 6-axis Zeiss systems for the final control and certification».
The adoption of the software and of the control system allows Ceba technicians to achieve better efficacy in the process management, annulling the previous need of piece motion from the grinding machine to the tester and vice versa, in case of non-compliance with the wished tolerances.
Technology in constant evolution
As already underlined, the company has always ascribed great importance to the technological upgrading, as confirmed by the constant introduction of new machinery into the various manufacturing departments.
«Just in the last 18 months – underlines Cesana – we have integrated into our workshop a good four new machines, including 2 new grinding machines able to grind up to 2000 mm of diameter and up to module 40, with CNC profile tool and quality control on the machine».
They are joined also by 2 CNC gear hobbing machines, able to cut gears with maximum diameters of 1,200 mm, installed in March 2016, to complete a gear cutting machine already operating since last year, but with a machining range up to 3,000 mm of diameter (module up to 30, with 1,000 mm vertical stroke).
«Non-standard machines – goes on Cesana – but developed according to our precise technical specifications, called to satisfy the most different requirements of the supplied sectors».
The added value of quality
To highlight and to certify the global quality of the whole activity carried out, last year a new professional, Mr Guido Fusetti, joined the company, entrusted precisely with the quality management role, especially from the regulatory, supervision and verification point of view.
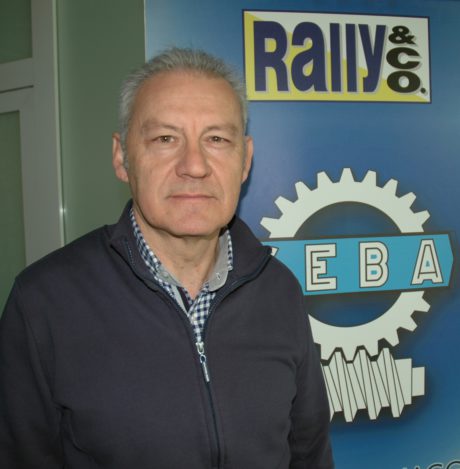
«The role of Mr Fusetti – states Cesana himself– has resulted in a much more organized quality management, compliant with requirements that today are no longer prerogative of the foreign market, as it happened just until some years ago but also of the Italian one».
Concerning export, on which Ceba Ingranaggi focuses with ever-increasing interest, today the percentage reaches 35% (with Europe, North Africa and Asia as main areas served directly and/or indirectly), growing as well as the turnover.
«2015 – confirms Cesana – was a very positive year for us, result achieved thanks to the precious contribution of our entire team that nowadays consists of about thirty people. Motivated and skilled operators to whom we gave a performance bonus at the end of the year, as acknowledgment of the commitment lavished and of the targets reached. Also 2016 started with good prospects, with a trend that, if maintained, will replicate again this appreciated initiative at the end of the year».
Positive outcomes enabled by a widening of the customer basis, «we are even implementing some mechanical parts that will be mounted on equipment at CERN in Geneva – underlines Cesana– and by a more and more structured vision of the activity, granting at the same time flexibility, lean operation and quick answers». Approach made possible by the fact that Ceba Ingranaggi in-house controls and manages (with the exception of the only heat treatment part) the whole process. From the purchase of raw materials (with the availability of rough bar material, ready to use in a warehouse constantly enlarged) to all necessary machining operations, until the delivery.
«More and more digital – ends Cesana – managerial course, with the total job order traceability in favour of the highest optimization of times, of the process, product and service quality».
Fig_04
View of Renishaw probe calibration.

