When it comes to vehicle repairs, NSK sets out to make processes faster, safer and more reliable for garage technicians and mechanics. For this reason, those purchasing NSK ProKIT solutions receive 100% genuine wheel bearings alongside all of the supporting components needed to perform a fast and high-quality wheel bearing replacement. Hub bearings are not the simplest of parts to install, which is why NSK is providing some extra tips to help avoid common mistakes. The first tip is to compare the fitted bearing to the new one before mounting. Selecting the incorrect bearing is the most common mistake made by technicians. If the bearing is selected correctly, it can be re-checked quickly using the NSK online catalogue. Those requiring further help are invited to make direct contact with NSK.
Avoid damage to the magnetic encoder
Some hub bearings feature a magnetic encoder for the ABS signal, and thus demand even closer attention. The encoder seals contain many north (N) and south (S) poles which are read by the speed sensor (Image 1). If the N+S poles get damaged during installation it can lead to failure of the ABS system.

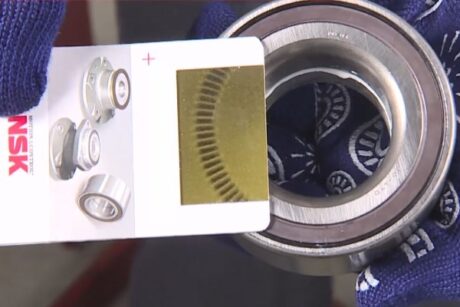
Garage technicians can identify if a hub bearing has an encoder by using an NSK test card. The same test card can also be used to establish whether a fitted bearing has pole damage (if the result does not look like Image 2), which in turn can help technicians identify ABS signal problems.
Keep the encoder from magnets and dirt
A good tip is to avoid coming into contact or getting near the encoder with tools such as spanners and screwdrivers as they can change the N+S poles, again leading to issues with the ABS signal. With this thought in mind, only remove the bearing from its protective packaging immediately before fitting.
Ensure correct encoder orientation
Encoders are only present on one side of Hub I generation wheel bearings – as identified by the test card – so it is vital to get the orientation correct when pressing into the knuckle. Before beginning this operation, always check that the encoder surface will be adjacent to the sensor after assembly.
Avoid pressure on the encoder surface

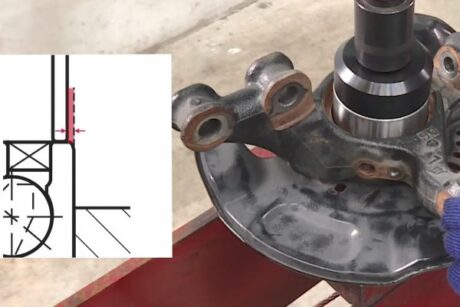
For pressing, use a tool that only contacts the end face of the outer ring on Hub I generation bearings (Image 3). Never press on the encoder seal and never press on the inner ring as it will lead to bearing failure within a few kilometres of use. Once a suitable tool has been selected, keep the bearing aligned to the bore and press it vertically into the knuckle.
Further tips for correct bearing installation
There are many general tips to keep in mind throughout the process, such as taking care of all suspension parts to avoid any unnecessary damage. Additionally, to ensure correct fitting of the bearing, it is especially important to control the hub and knuckle during assembly, while all surfaces which come into contact with the bearing should be cleaned beforehand (Images 4 and 5).
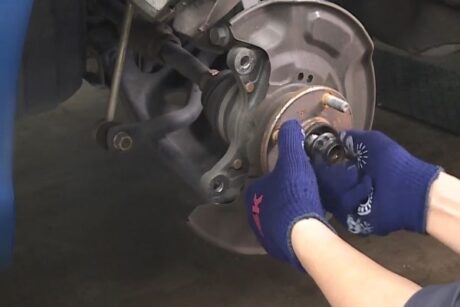
As a final point of note, for safe reassembly, technicians should only use only the recommended tightening torques recommended by the car manufacturers. In particular, it is known that applying excessive torque to the CVJ nut can lead to bearing damage (Image 6).

The correct fitting of Hub I generation wheel bearings with magnetic encoders is especially challenging, which is why NSK has produced a video on this subject that shows every step of the process. NSK also offers special training that focuses on wheel bearings. Those interested are requested to make direct contact.


